- How to start a new session
- How to assign percentages to your work
- How to create an assignment for the class
- How to assign classes to teacher
- How to Add or Edit Teacher(s)’ details
- How to Add or Edit Subjects
- How to deal with the attendance for the class
- How to calculate the final grade of the student from the cumulative work given
NOTE: the gradebook for the advanced level has some features similar to this gradebook with some few differences. You can therefore use some instructions here to get familiar with it.

How to start a new session #
- Step 1: Select the Subject you are teaching
- Step 2: Select the week number
- Step 3: Select the Term
- Step 4: Select the year
- Step 5: Select first the “Prev Entry” in the Status to see if your Entry is a Prev Entry then click the FILL button
NOTE: If the display screen does not show anything, it means your Entry is not in the record and hence it is a new Entry
- Step 6: Having confirmed that it is a NEW ENTRY then choose “New Entry” in the status then Click the FILL Button
NOTE: If the display screen shows something, it means your Entry is in the record and hence it is a Prev Entry/ Old Entry. What you are required from there is just to update your work by either adding grading for your students or assigning them the work etc.
How to assign percentages to your work #
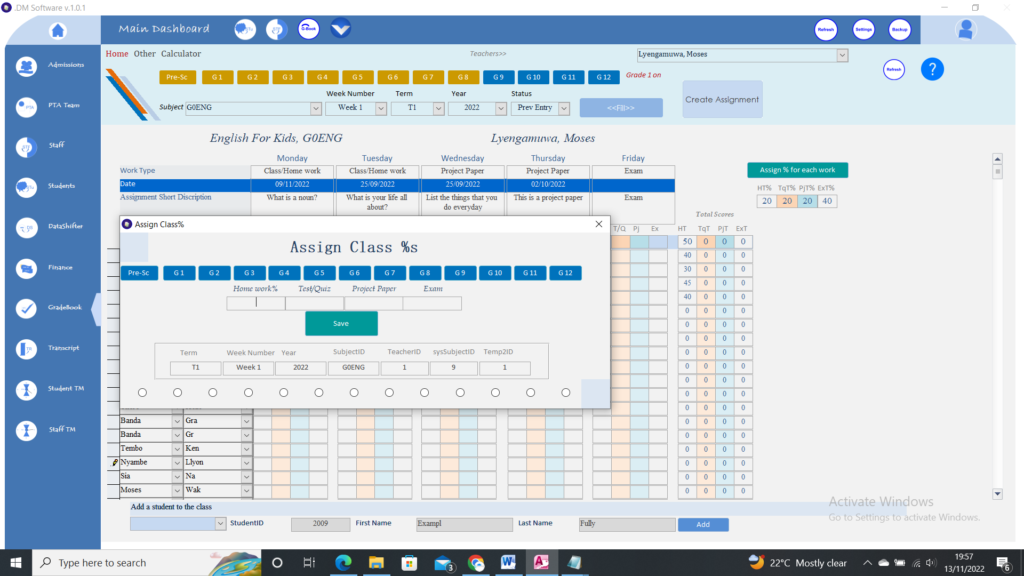
- Click on the Assign % for each work button
- Click on the grade filter
- Enter the % according to your grading style
- Click save
How to create an assignment for the class #

- Click on the grade filter. The option buttons below are there to help you know that you are dealing with the right grade
- Enter the work type. This should be according to your school
- Enter the date
- Enter the points for the assignment
- A short description of the assignment
- Choose the day (see the required settings)
- Choose the type of assignment (see the required settings)
NOTE: Any work that you carry out that requires grading which is not a test or project paper or exam can be put in this category of Homework. For instance, vocabulary that you practice with students in class, etc. can be put in this category. You can interpret the Homework field the way you desire.
How to assign classes to teacher #
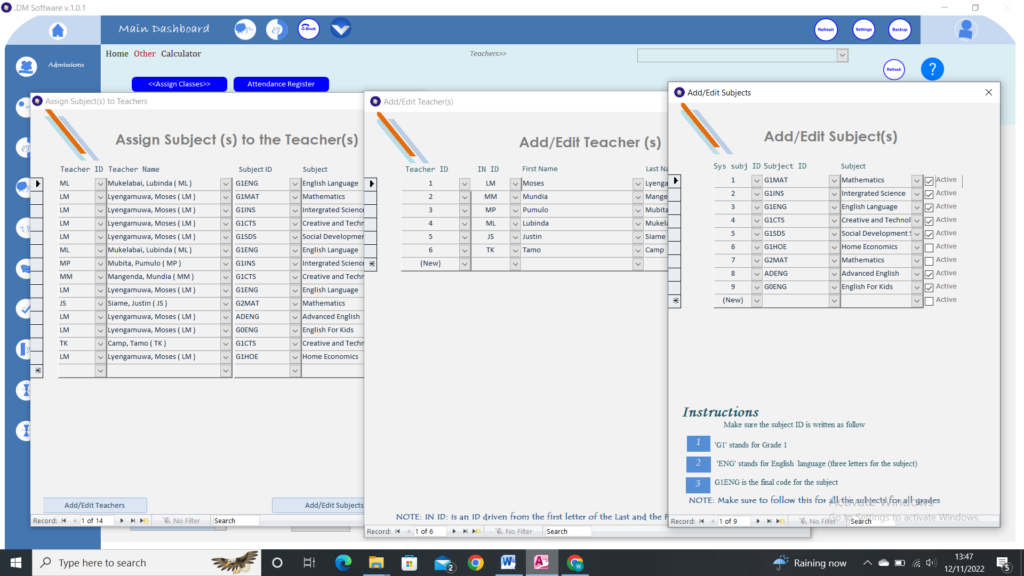
- Go to the other tab and click on the assign button
- The Assign subject to the teacher (s) form will pop up
- Choose the teacher from the teacher ID combo. The teacher’s name will show up
- Choose the subject from the subjectID Combo. The subject name and systemID will show up automatically
NOTE: When you have filled up your teachers in the system following the steps below (How to add/edit teacher’s details), you can replace these default teachers by following the steps shown above
How to Add or Edit Teacher(s)’ details #
- Click on the add/edit teacher button
- The add/Edit Teacher (s) Form will pop up
- Add the Teacher using the field made available at the end of the list of names. Information is saved automatically
How to Add or Edit Subjects #
- Click on the add/edit subject button
- The add/Edit Subject (s) Form will pop up
- Add the subject at the end of the given field. You can edit the default subjects. Please follow the instruction given on the form. The grading system depends on it.
How to deal with the attendance for the class #
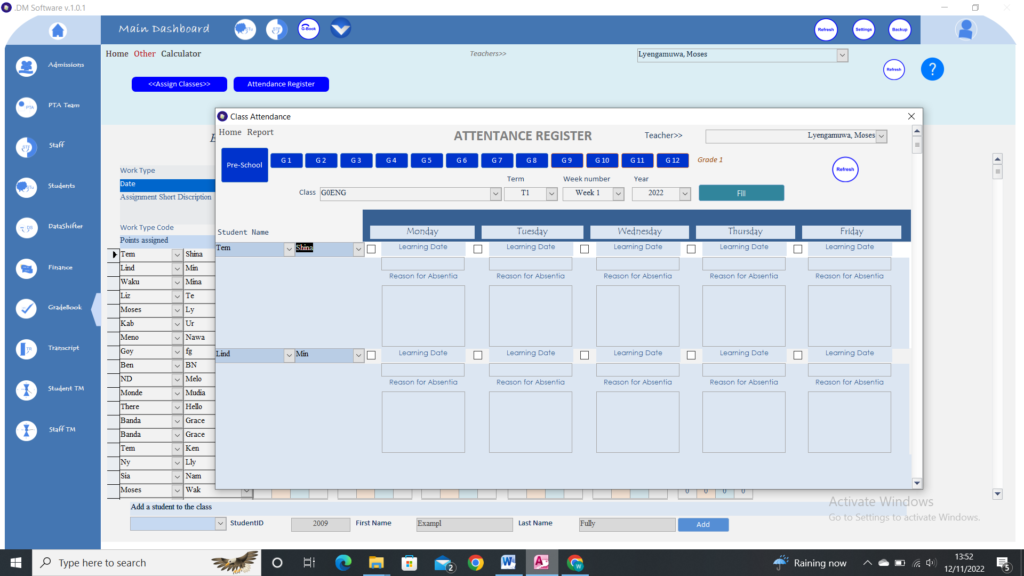
- Click on the attendance register button. The form shown above in the figure will show up
- Select the teacher
- Click on the grade filter button of the class you are teaching
- Select the subject from the class combo. Note that when you select the teacher, all the subjects that you have assigned are ones that will show up in this combo.
- Select the term
- Select the week number
- Select the year
- Click fill
- You can then edit the information given
To see the Report for this attendance:
- Click on the grade filter of the class you are teaching
- Click on the report button.
How to calculate the final grade of the student from the cumulative work given #
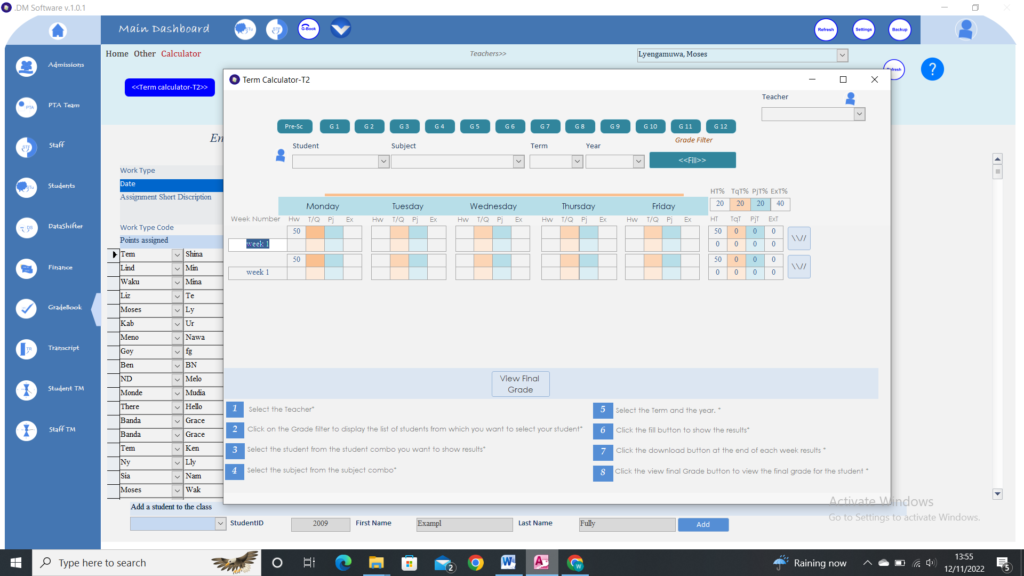
- Go to the Calculator tab and click on the Term calculator-T2 button.
- The form in the figure above will pop up
- Select the teacher
- Click on the grade filter to fill in the student combo
- Select the student
- Select the subject
- Select the term
- Select the year
- Click fill
If your results are as shown in the figure above, begin clicking the button on the next row to send the information to the final grade viewer and if they are many more rows follow by doing the same. Then click the first row after you have done that. This is so because when you assigned the percentage for your work, only the first row has those values unless you did assign the percentage of your work every week. However, to reduce the work it is good just to do it once.
- Click on the view final grade button. The highlighted form below will show up.
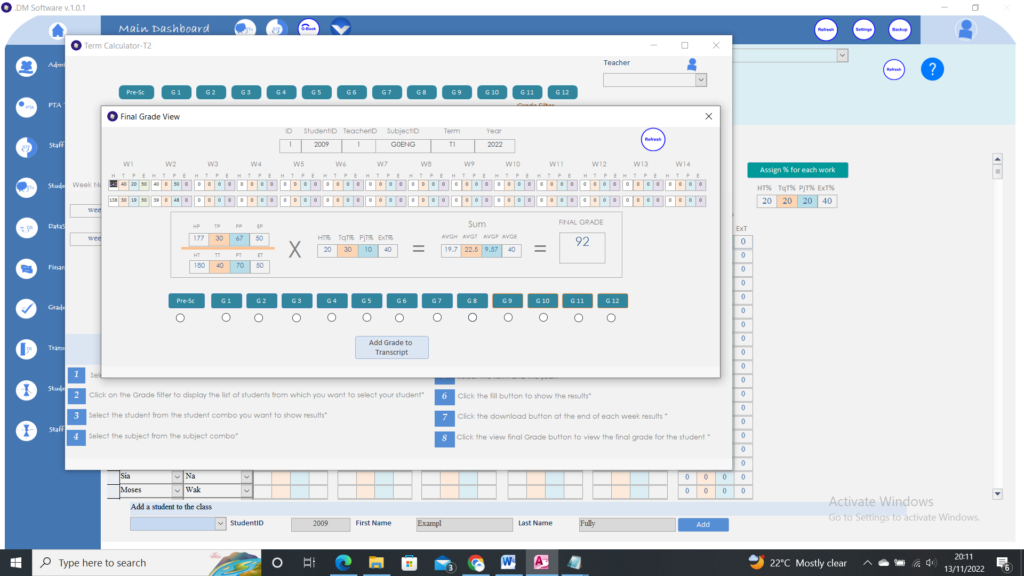
To send the grade to the transcript, click on the grade filter then click the add Grade to Transcript button.


